Генератор коробок для лазерной резки


Консоль #2

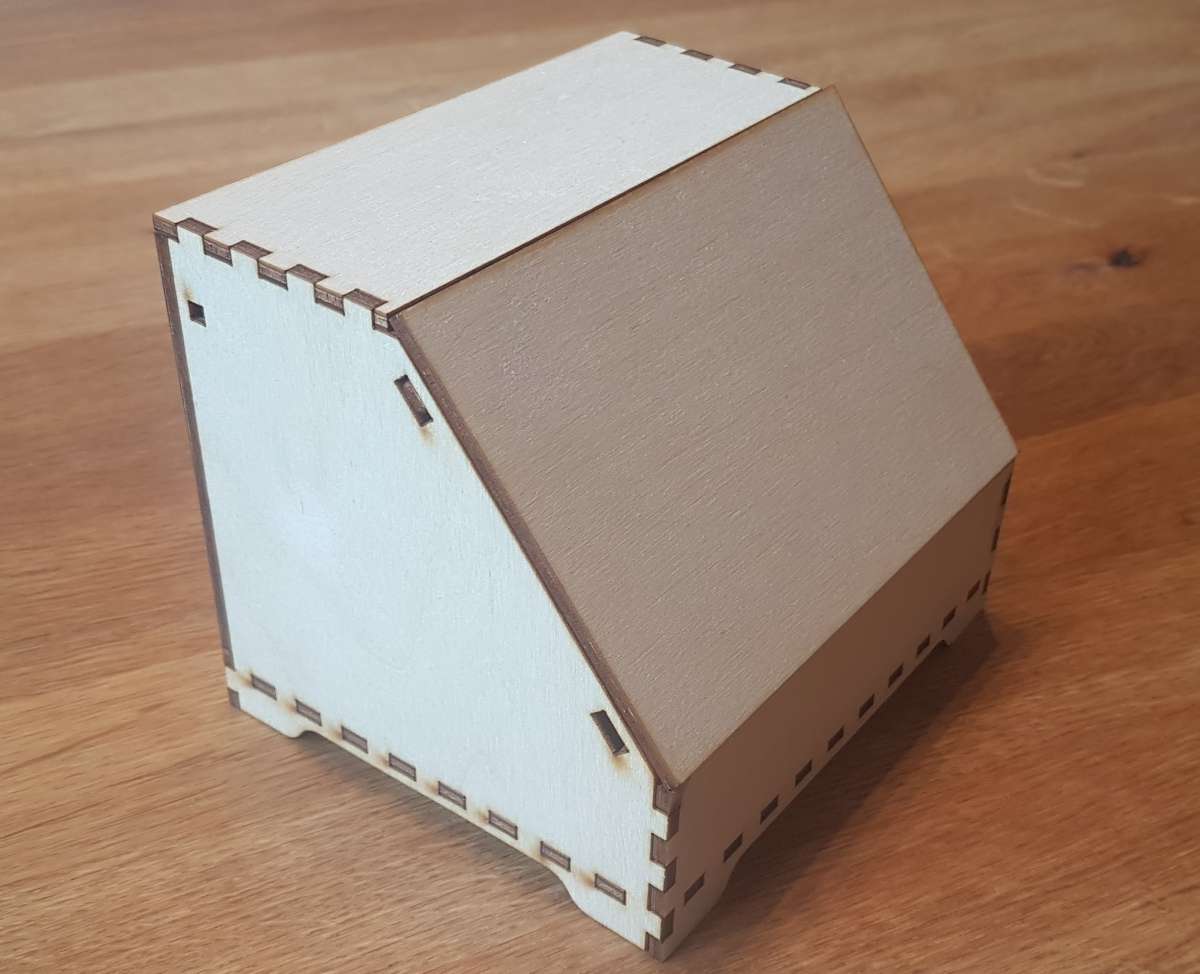
Консоль с наклонной панелью и сервисными лючками

Настройки шип-паз

Угол
Вид

Вид шипа

Отступ от края

space at the start and end in multiple of normal spaces

bottom_lip

height of the bottom lips sticking out (multiples of thickness) FingerHoleEdge only!

Отступ снизу

Расстояние под отверстиями под ШИП. Позволяет поднять дно.

Доп. длина

Удлиненный ШИП, для шлифовки. Чтобы избавиться от коричневых торцов [кратное толщине материала]

Шип

Ширина шипа [кратное толщине материала]

Зазор

Зазор отверстия под шип [кратно толщине]

Пробел

Пробел между шипами [кратное толщине материала]

Ширина

Толщина паза [кратное толщине материала]

Параметры ножек

Угол

Внутренний угол у ножек

bottom_stabilizers

height of strips to be glued to the inside of bottom edges (multiples of thickness)

Высота

Высота ножек [кратная толщине]

Отступ снизу

Расстояние от отверстий для шипов до нижнего края [кратное толщине материала]

Ширина

Ширина ножек [кратное толщине материала]

Особые параметры

Ширина [X]

Внутренняя ширина в мм [если не выбрана внешняя сторона]

Длина [Y]

Внутренняя длина в мм [если не выбрана внешняя сторона]

Высота [Z]

Внутренняя высота в мм [если не выбрана внешняя сторона]

Нижний край

Тип нижней кромки

Внешняя

Вычислять по внешним размерам, включая толщину стен

Фронтальная высота

Высота передней части [в мм]

Угол

Угол наклона передней панели [90° = прямо]

Съёмная задняя стенка

Имеются защелки на задней стенке

Съемная панель

Панель держится на защелках и может быть снята

Вклееная панель

Панель приклеена и не удерживается шип-паз соединениями

Базовые параметры

Толщина

Толщина материала в мм

Формат файла

Формат файла для скачивания

Перемычки

Ширина перемычек в мм, чтобы деталь не выпадала при резке [поддерживается не везде]

Отладка

Печатать обрамление для некоторых структур

Метки

Подписать детали [если доступно]

Эталонный прямоугольник

Вывод эталонного прямоугольника с заданной длиной [в мм] [0 для отключения]

Внутренние углы

Стиль для внутренних углов

Коррекция луча

Коррекция реза лазером в мм [большие значения для более плотной посадки в пазы]


This box is designed as a housing for electronic projects. It has hatches that can be re-opened with simple tools. It intentionally cannot be opened with bare hands - if build with thin enough material.

Caution

There is a chance that the latches of the back wall or the back wall itself interfere with the front panel or it's mounting frame/lips. The generator does not check for this. So depending on the variant chosen you might need to make the box deeper (increase y parameter) or the panel angle steeper (increase angle parameter) until there is enough room.

It's also possible that the frame of the panel interferes with the floor if the hi parameter is too small.

Assembly instructions

The main body is easy to assemble by starting with the floor and then adding the four walls and (if present) the top piece.

If the back wall is removable you need to add the lips and latches. The U-shaped clamps holding the latches in place need to be clued in place without also gluing the latches themselves. Make sure the springs on the latches point inwards and the angled ends point to the side walls as shown here:

Back wall details

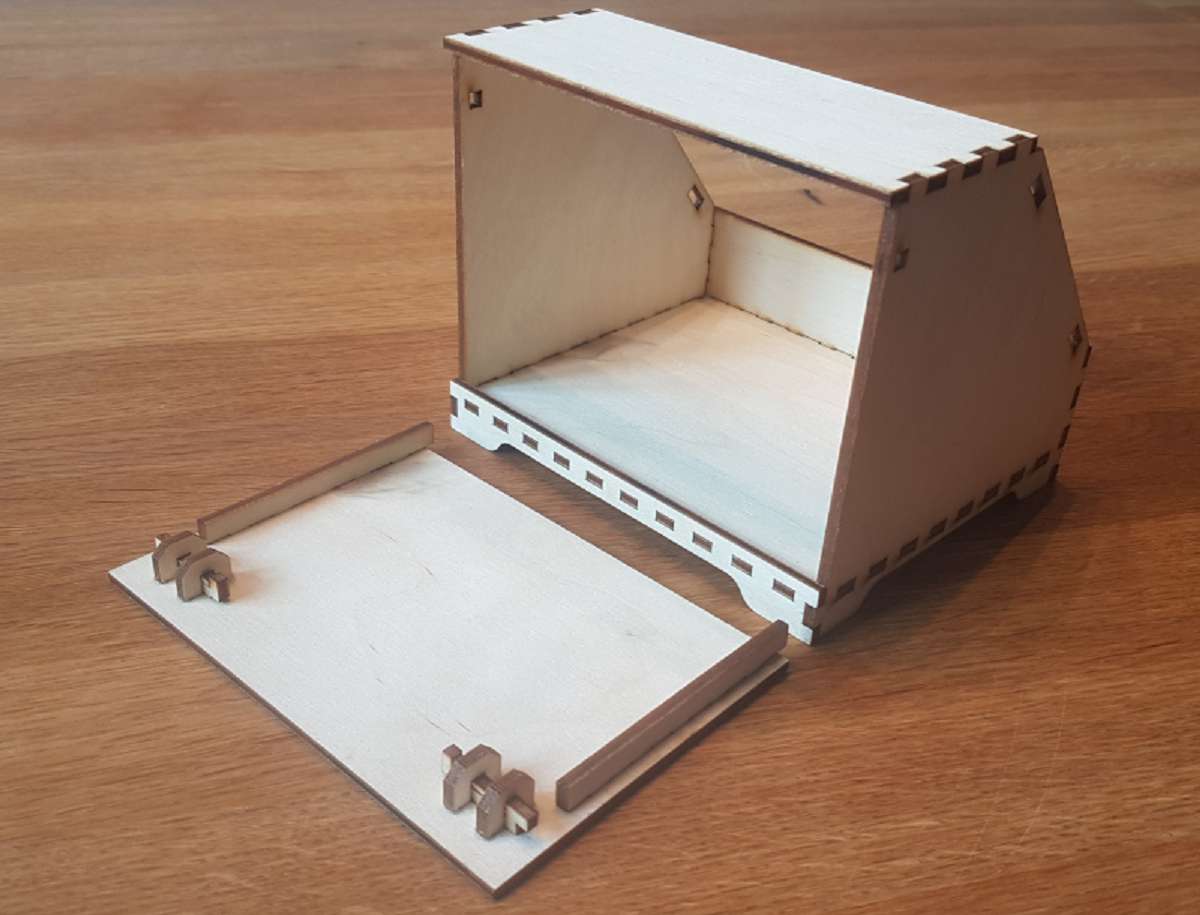
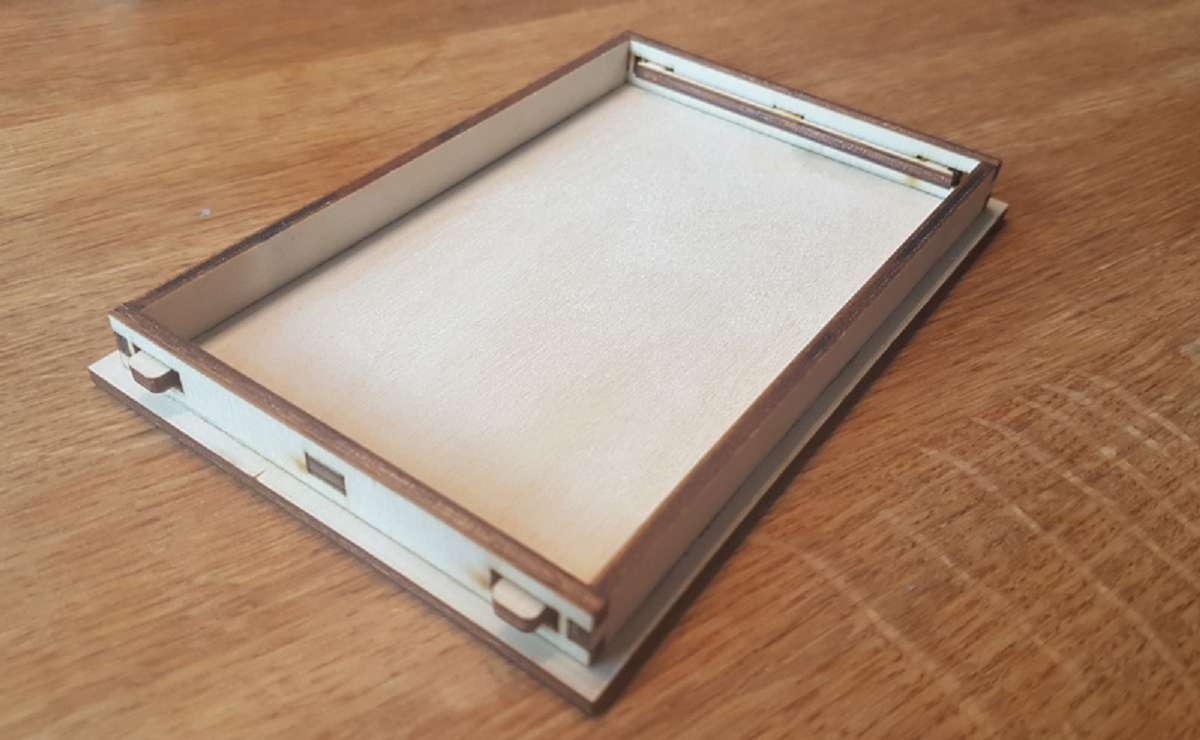
If the panel is removable you need to add the springs with the tabs to the side lips. This photo shows the variant which has the panel glued to the frame:

Back wall details

If space is tight you may consider not gluing the cross pieces in place and remove them after the glue-up. This may prevent the latches of the back wall and the panel from interfering with each other.

The variant using finger joints only has the two side lips without the cross bars.

Re-Opening

The latches at the back wall lock in place when closed. To open them they need to be pressed in and can then be moved aside.

To remove the panel you have to press in the four tabs at the side. It is easiest to push them in and then pull the panel up a little bit so the tabs stay in.